The Best Dual Camera Strap for Adventurous Photographers
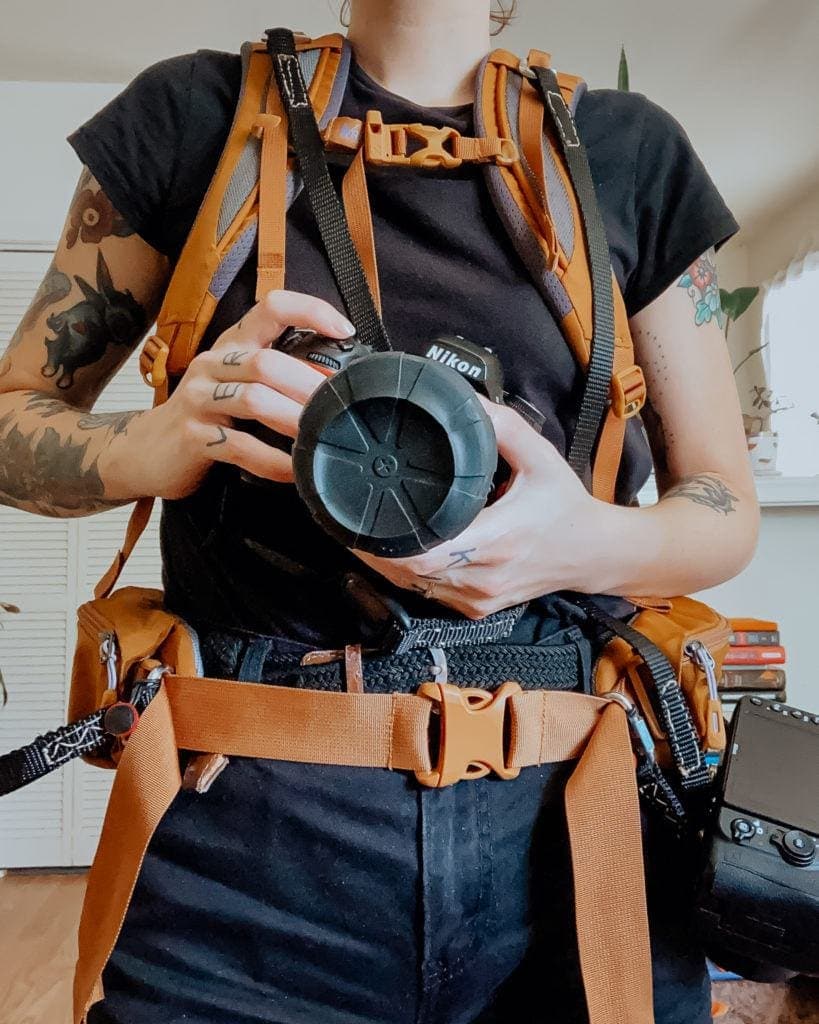
We’ve all been there.
You get to the end of a long day of shooting, and all of a sudden the pain in your back and feet hits you like a tsunami.
All of your favorite camera gear is designed to be sturdy and safe for your expensive cameras and lenses, but seemingly ignores the experience of actually wearing it for, say, your standard 10-hour wedding day.
Turns out, ergonomics aren’t just for desk jockeys.
Many of our favorite camera gear brands have tried to solve the problem. You’ve probably tried something like the famous “Moneymaker” dual camera harness, which keeps your cameras safe and handy, but leaves you supporting all of the weight with your upper back.
Talk about migraine fuel!
Then there are systems like the popular “Spyder Holster” or the brilliantly engineered “Peak Design Capture Clip” which allow you to take the weight off of your shoulders but are notorious for either pulling your pants down or needing your belt to be fastened uncomfortably tight to be stable. Plus, with the Spyder system, forget about using it in tandem with other gear like a backpack!
Obviously, solving the problem of safe and comfortable dual camera carry is something the photography community is still figuring out, and I’m eager to see how the technology advances and we get more scientific, engineering types on the job.
Luckily, there’s a solution for us outdoorsy types!
The Hiking Backpack Dual Camera System
Hiking backpacks are painstakingly engineered to offer the most comfortable and customizable way to comfortably carry a heavy load.
Unfortunately, most camera-specific gear is designed to hold a lot, provide some amount of cushioning, and look cool, without much thought for the wearer’s comfort.
By building a camera carry system off of the base of a hiking backpack, we’re not only taking advantage of a design that is optimized for comfortable weight distribution, we are also creating a tailor-made solution for photographers who shoot adventurous elopements and the like.
How it’s made
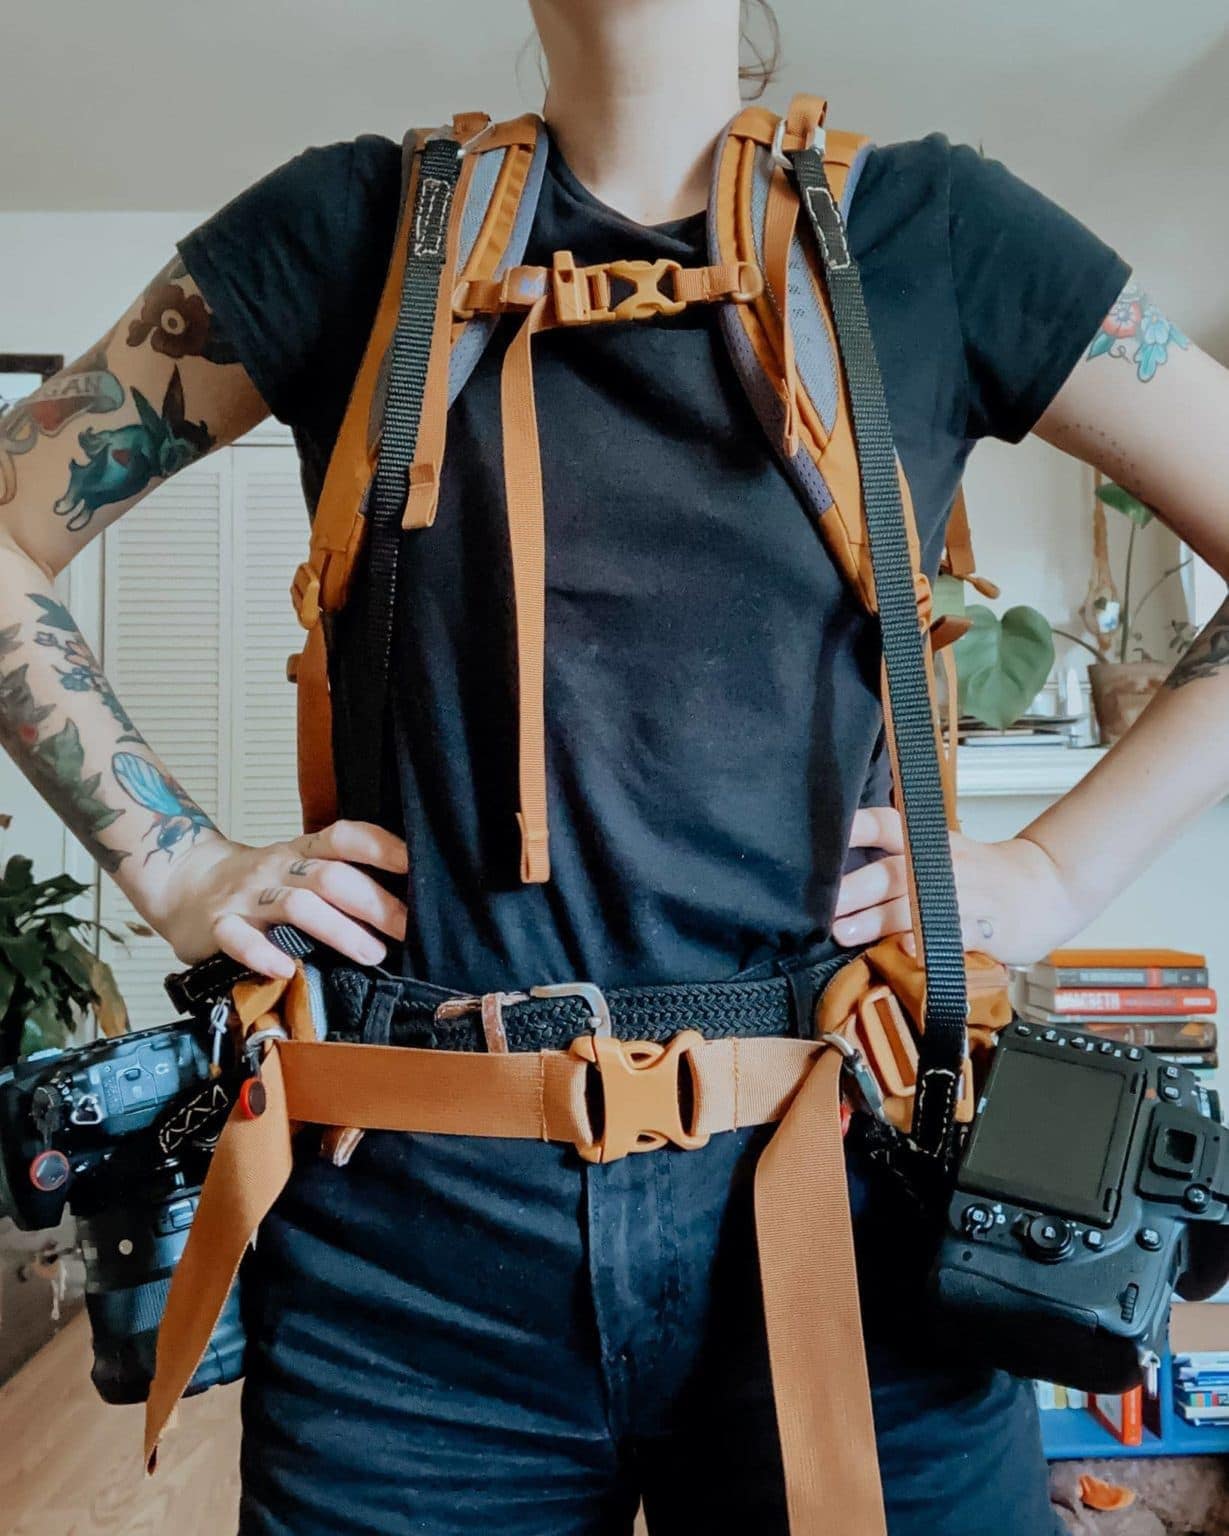
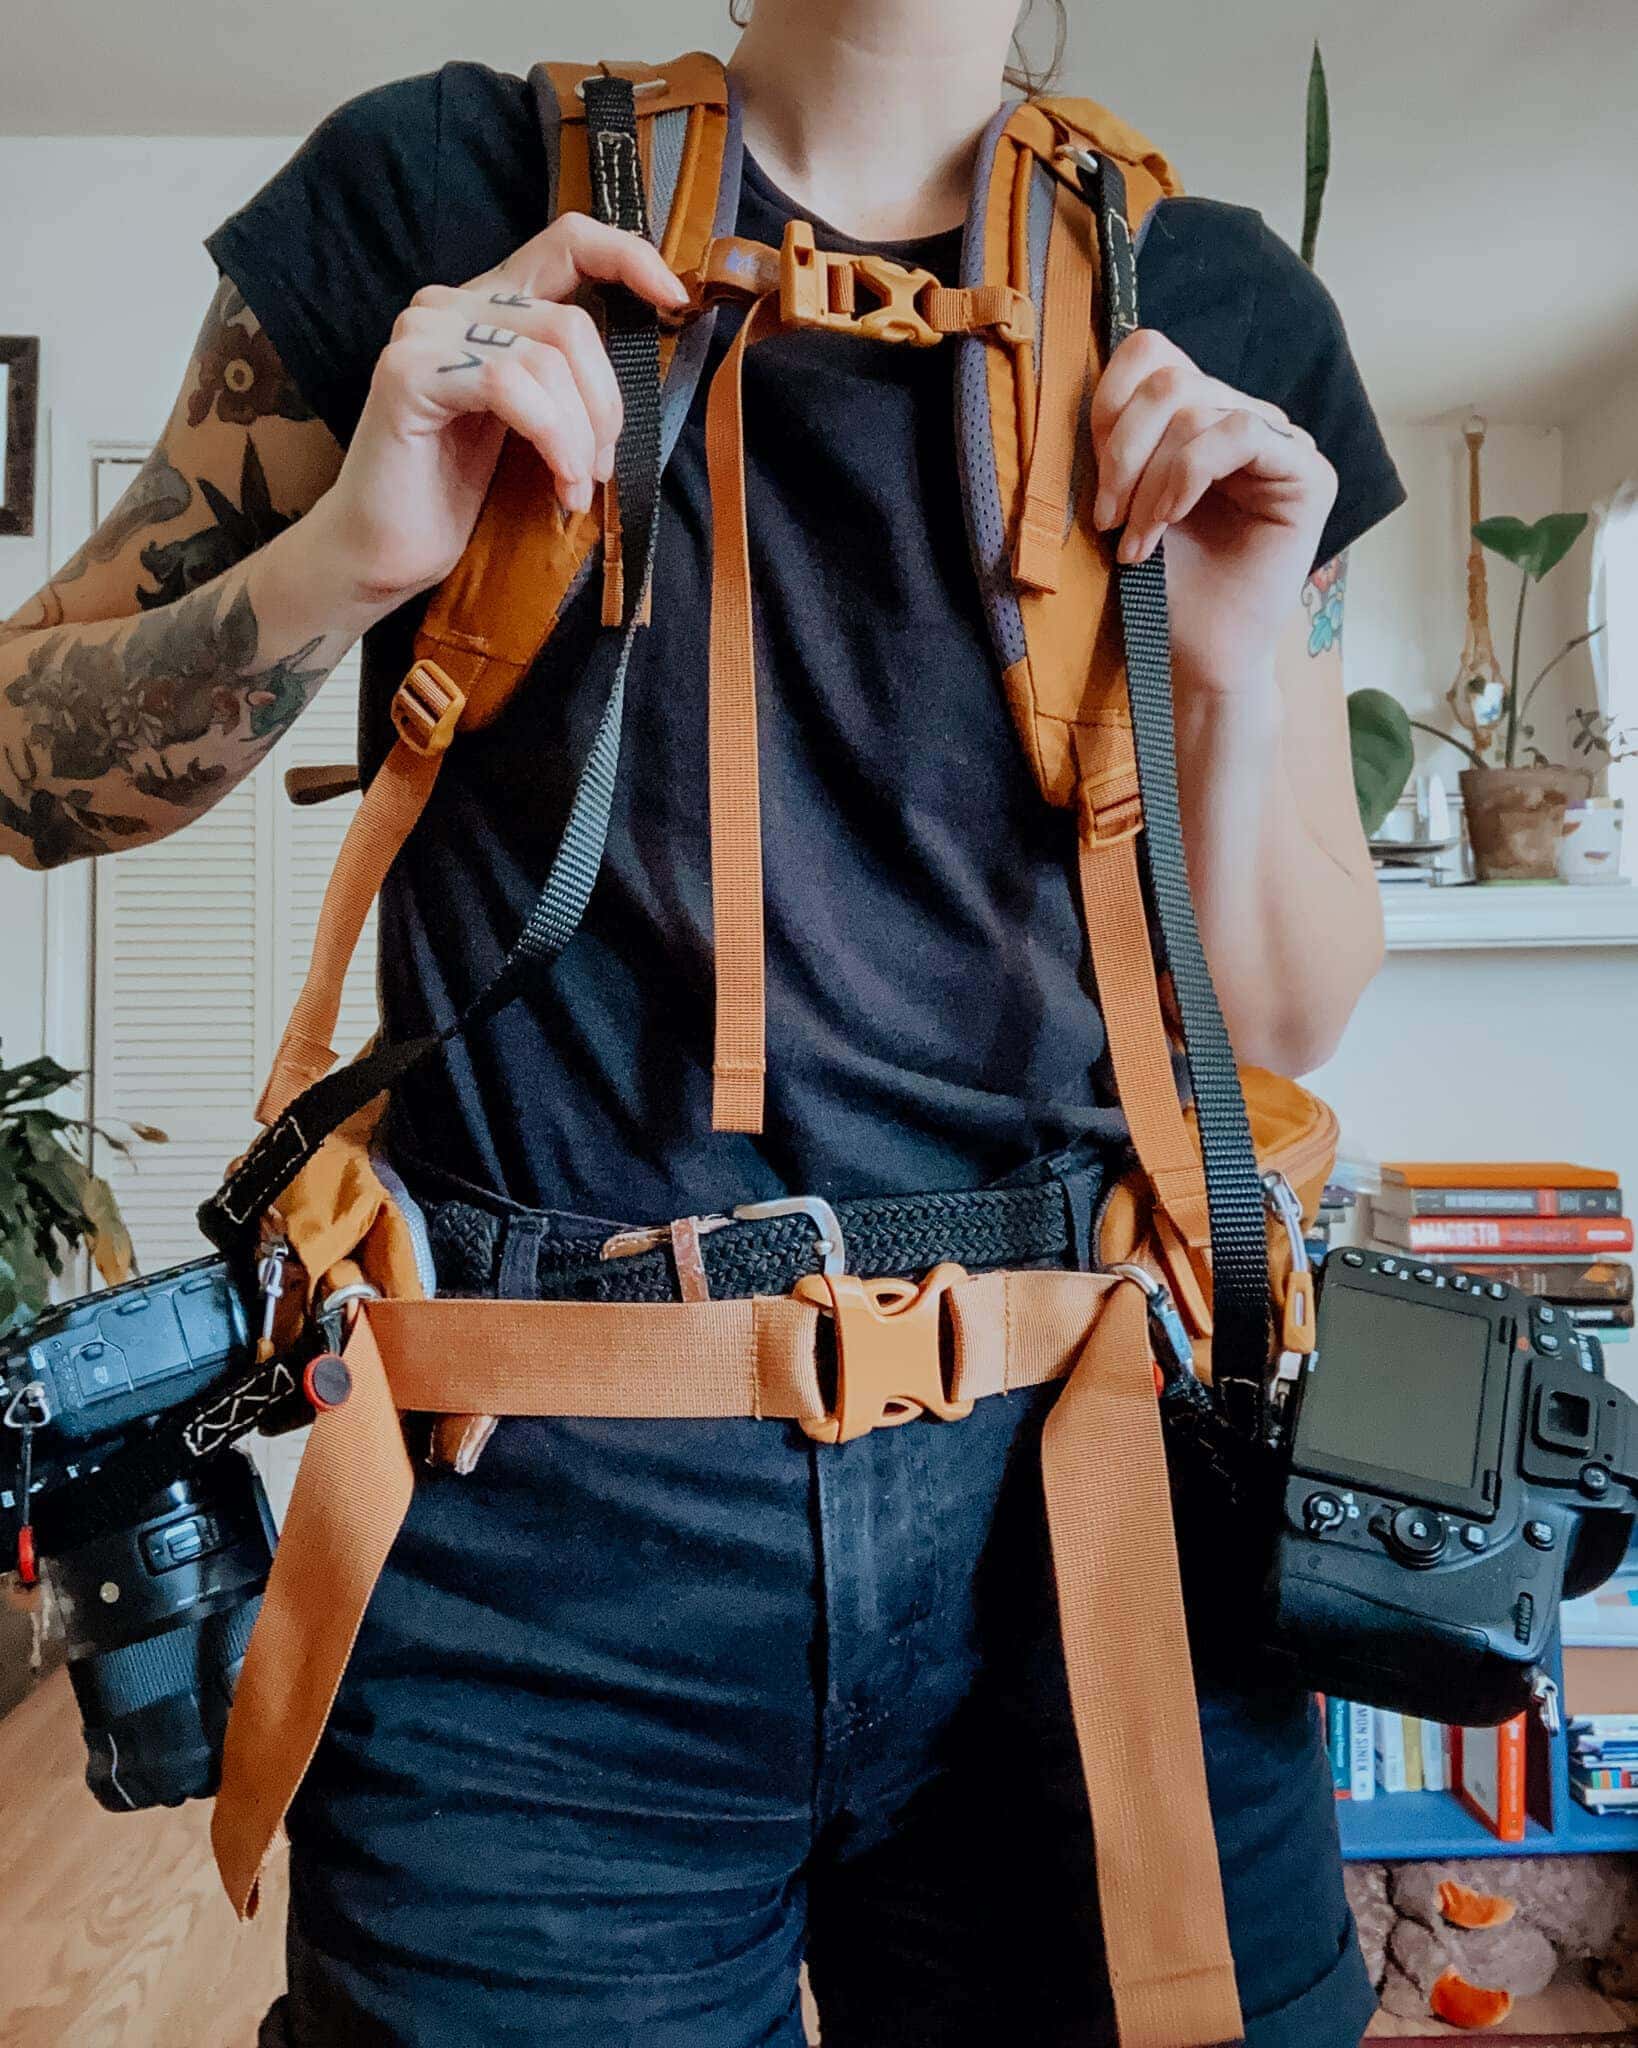
The overall design is exceedingly simple. By adding four sturdy straps onto your hiking backpack, you turn it into the most comfortable dual camera harness you’ll ever meet.
If you’re like me, you have multiple backpacks that you use depending on how much you’re carrying, the length of your hike, and where you’re going.
That’s why this design is completely removable, allowing you to switch the same harness system between multiple backpacks depending on your need.
My design was inspired by a design by Maddie Mae of Adventure Instead.
What you need
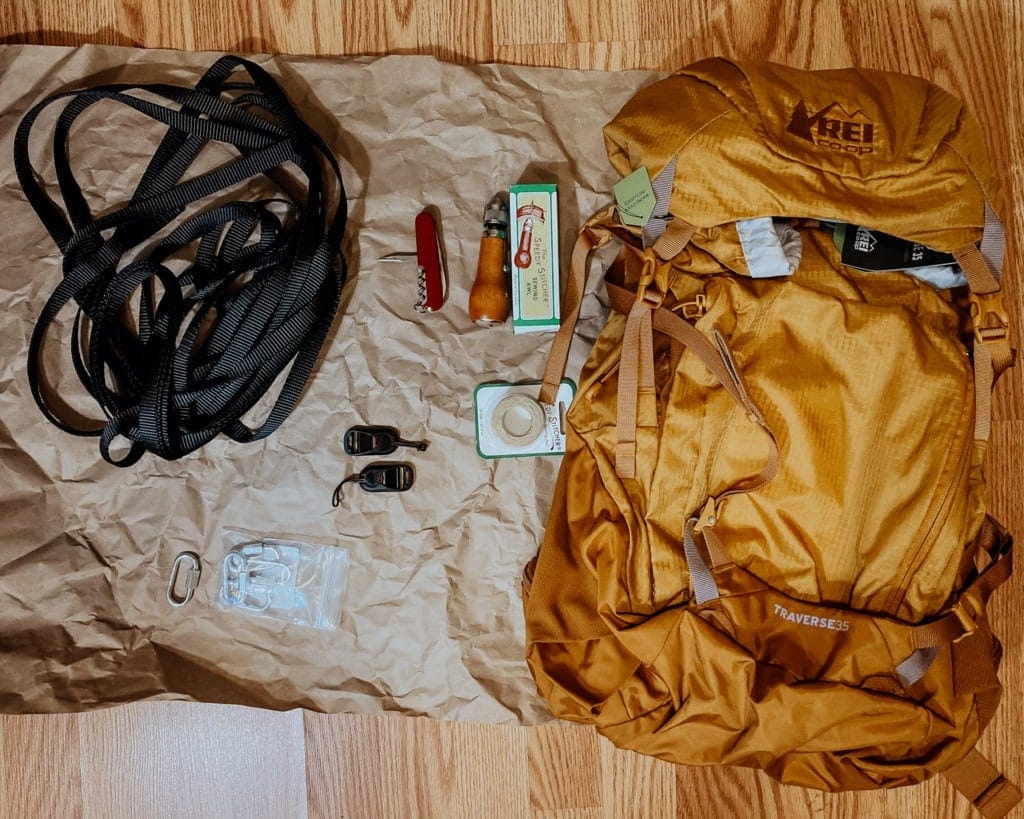
Build Your Own
Find Sturdy Attachment Points
The first step is to give your backpack a careful once over to identify where you can attach the anchor points for each strap. Ideally, you’re looking for a sturdy loop or strap up on your shoulders, and two points on either side of your hip belt pocket.
I’d recommend identifying these points on your pack before purchasing your quick links or carabiners, in case you end up with specific size requirements to make your attachment points work.
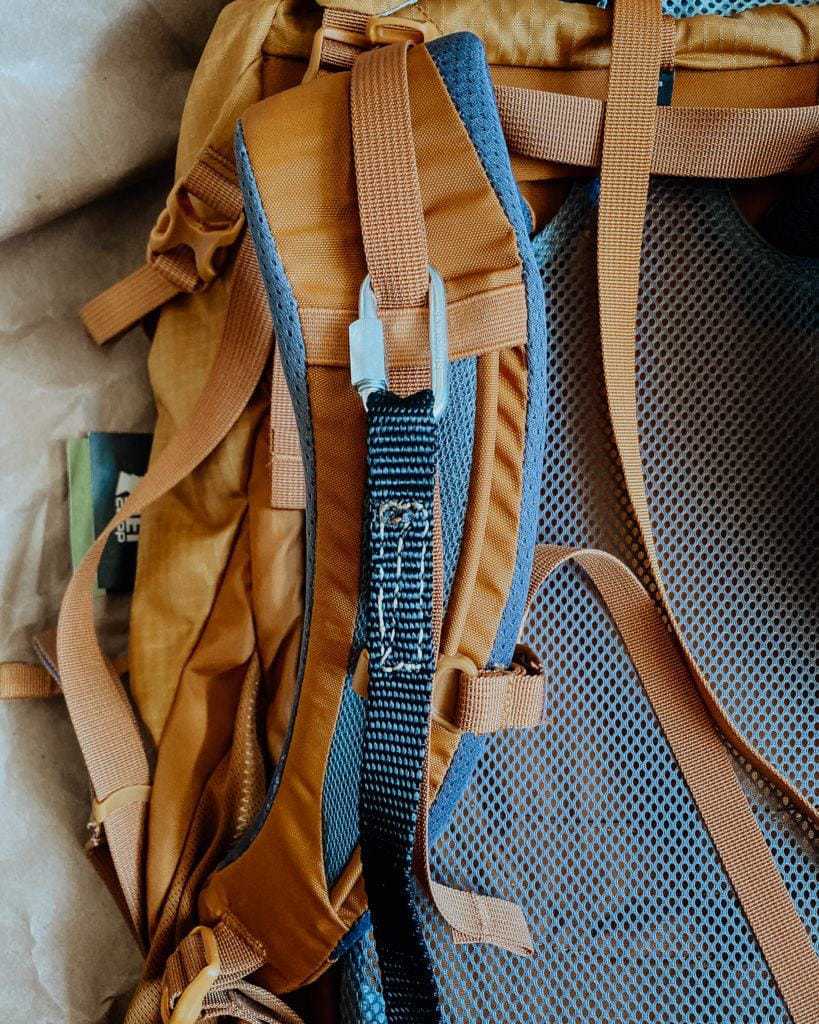
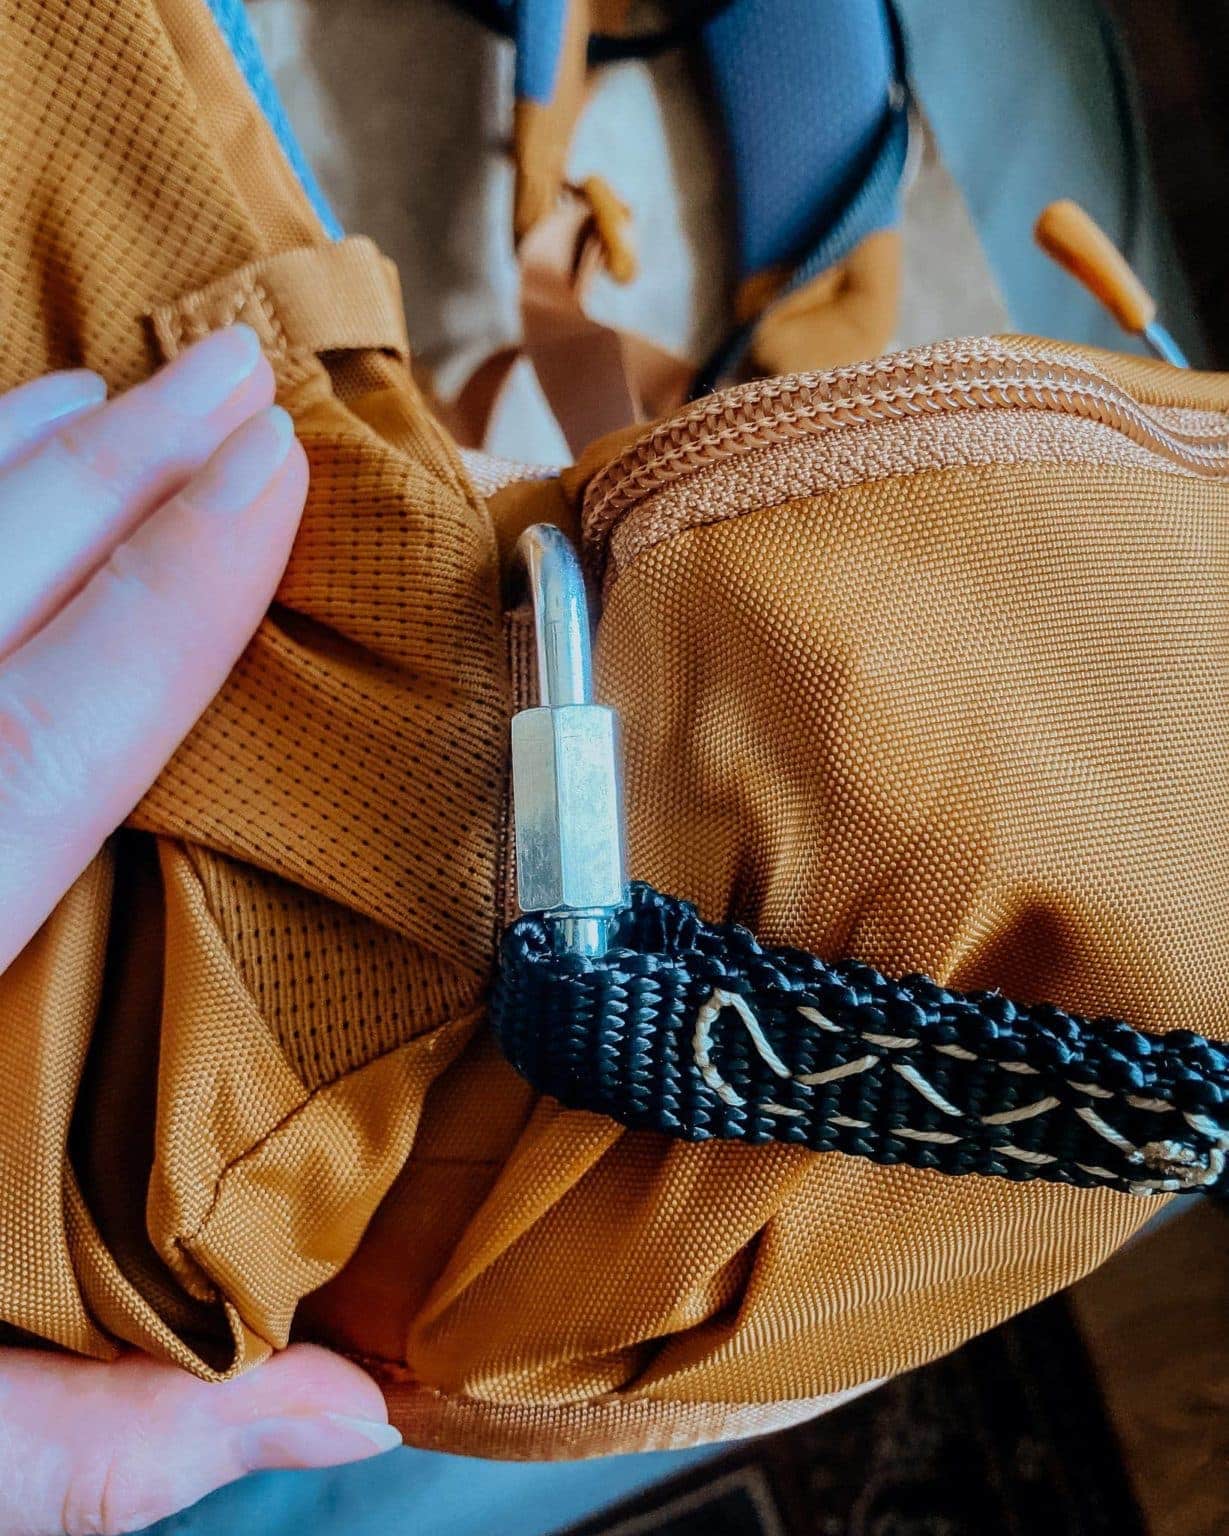
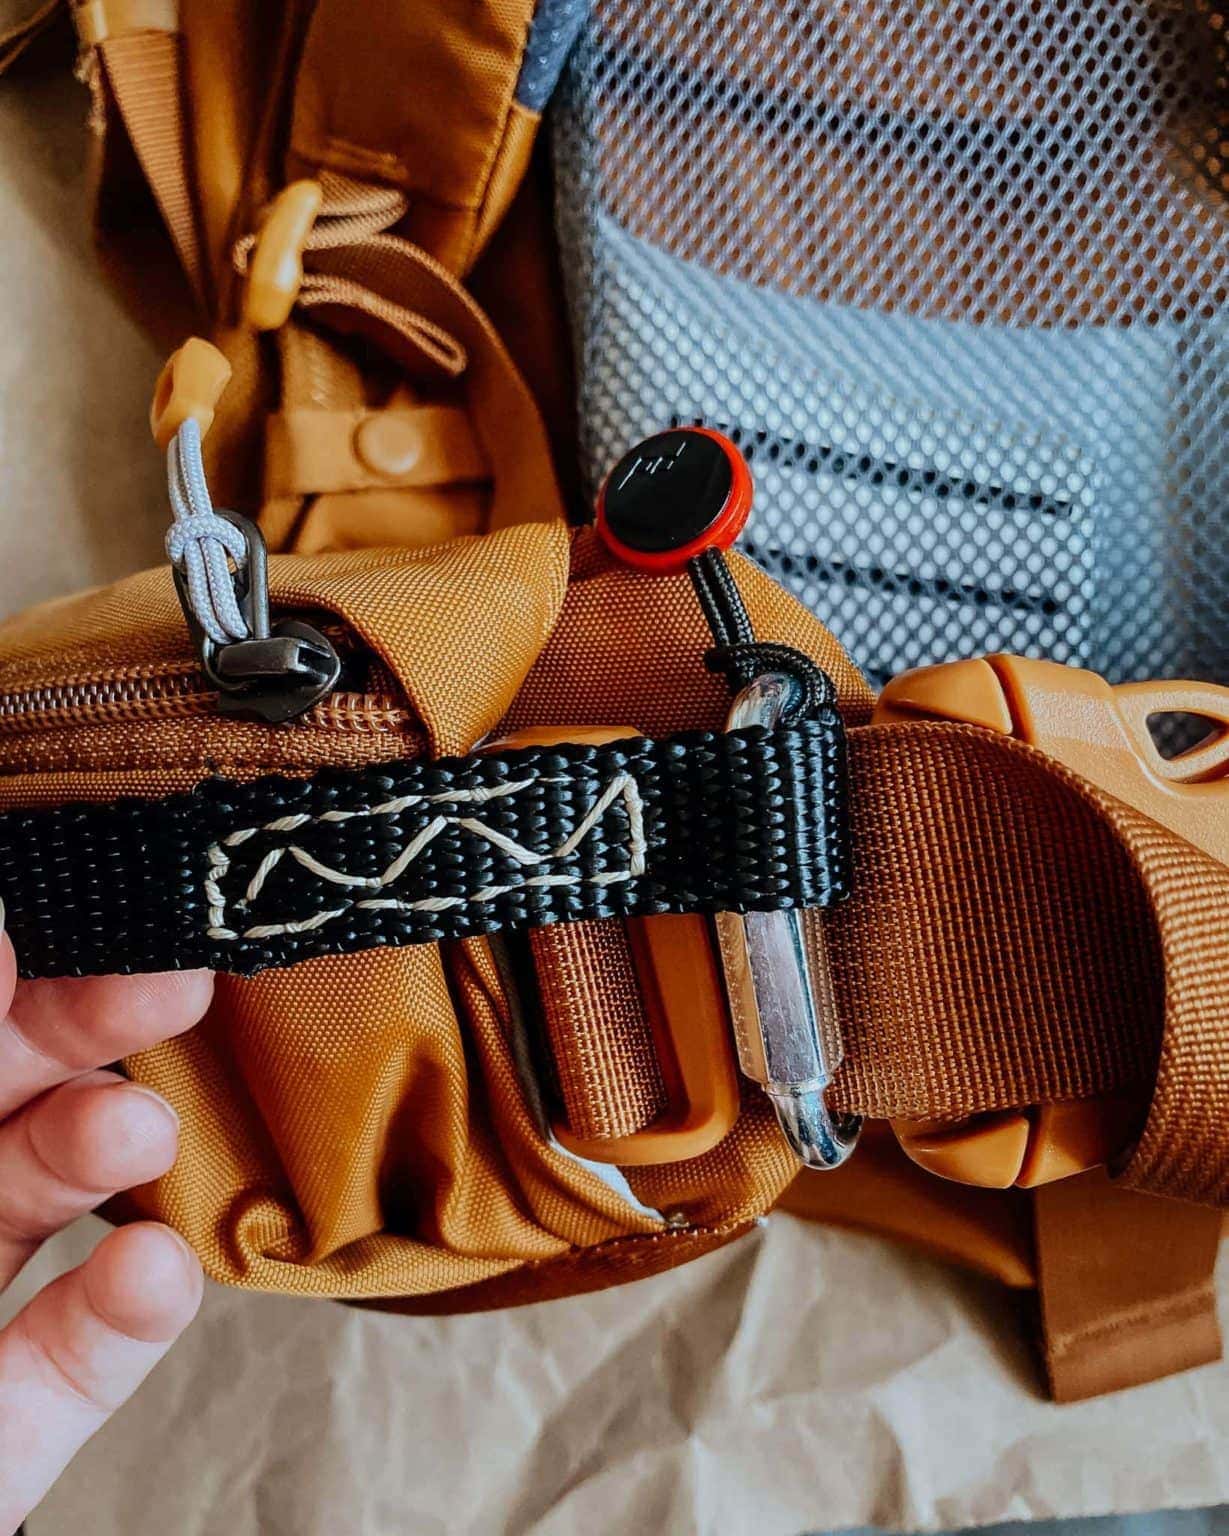
size and Sew the different straps
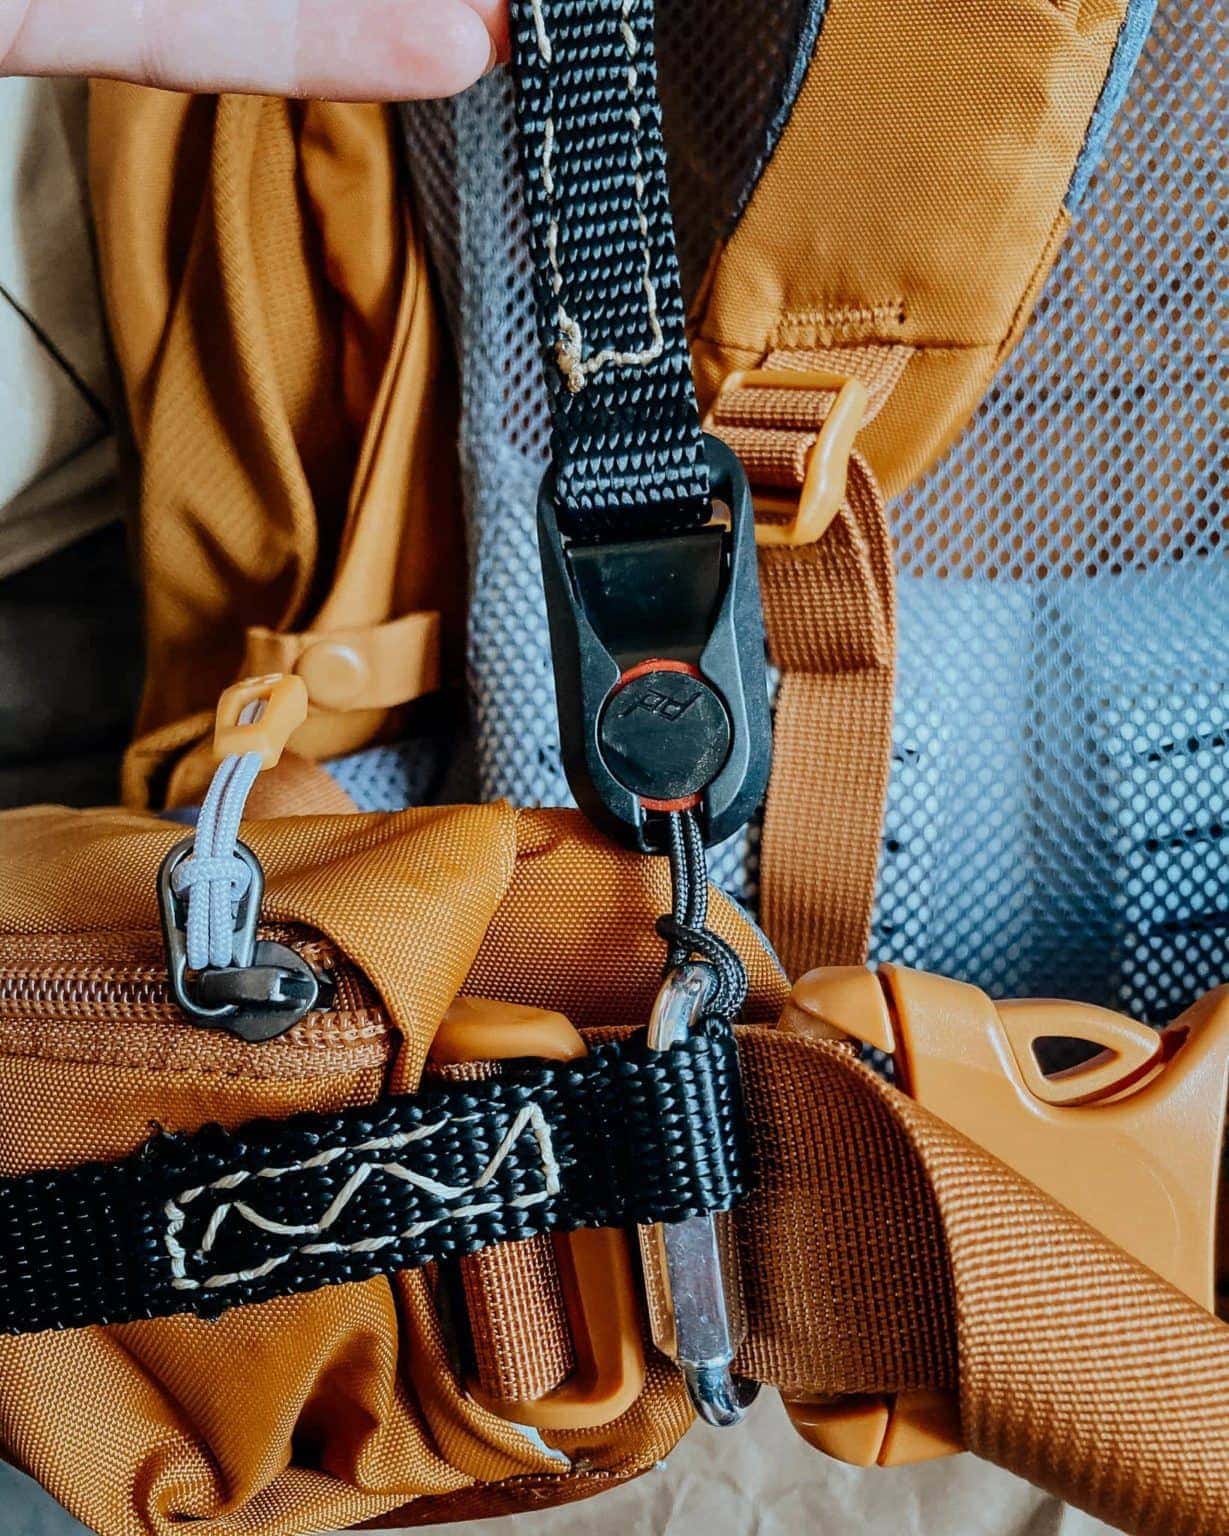
Once you’ve identified sturdy attachment points for your dual camera strap, you’ll need to sew the appropriate straps. The shoulder “safety straps” have a quick link (or carabiner) on one end, and your chosen camera clip on the other (Peak Design Anchor Clips shown here).
The “safety straps” should be long enough that they could attach comfortably to a camera nestled by your hip belt pocket without being so tight that they pull the camera out of the “hip belt loop” or so loose that there is a lot of slack that could catch on something.
For reference, I am 5’6 using a Womens size Small pack, and my “safety straps” were cut to be about 2 feet long, and have about two inches of overlap where they are sewn on each end, meaning that they hang at about 19-20 inches. I say “about” because I didn’t carefully measure anything during the construction process.
I just eyeballed the length of one “safety strap” and one “hip belt loop” and then just measured the lengths of paracord for the other side against those initial cuts.
I intentionally made them long enough that I could hold my camera far up above my head without having to detach them from the “safety strap,” and I have long arms, so I have a bit more slack on mine than you may need.
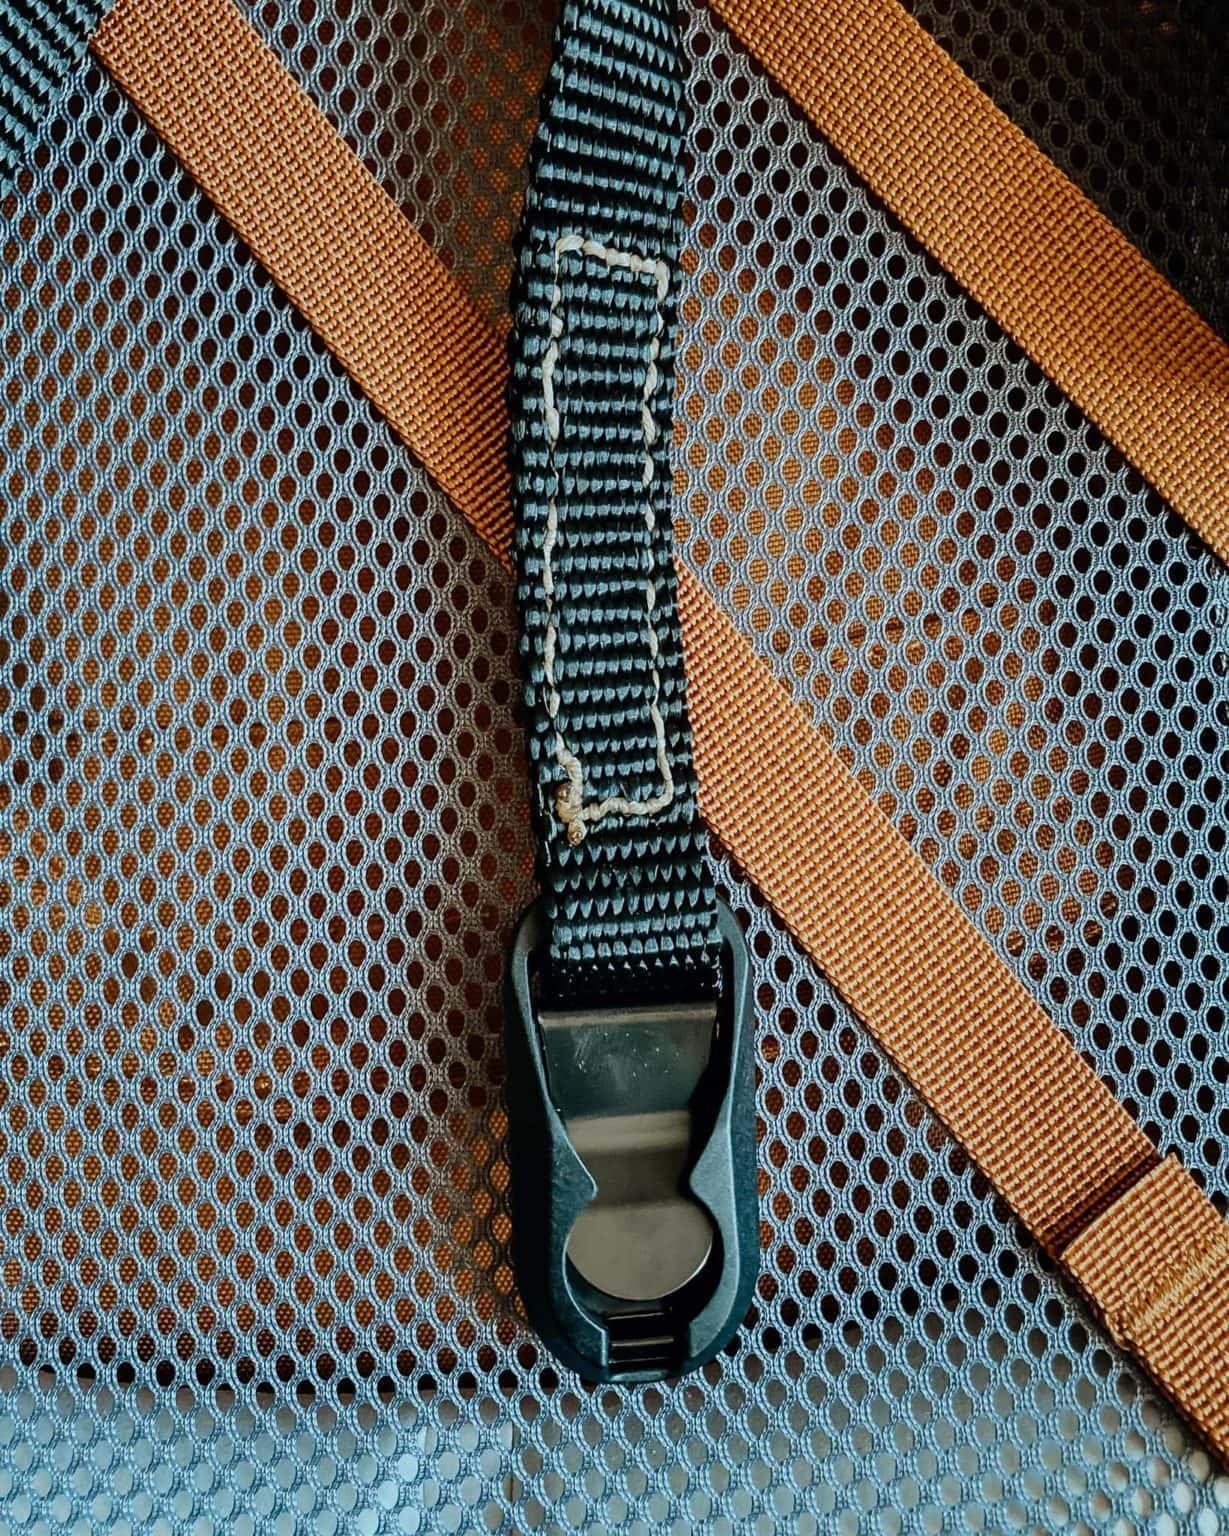
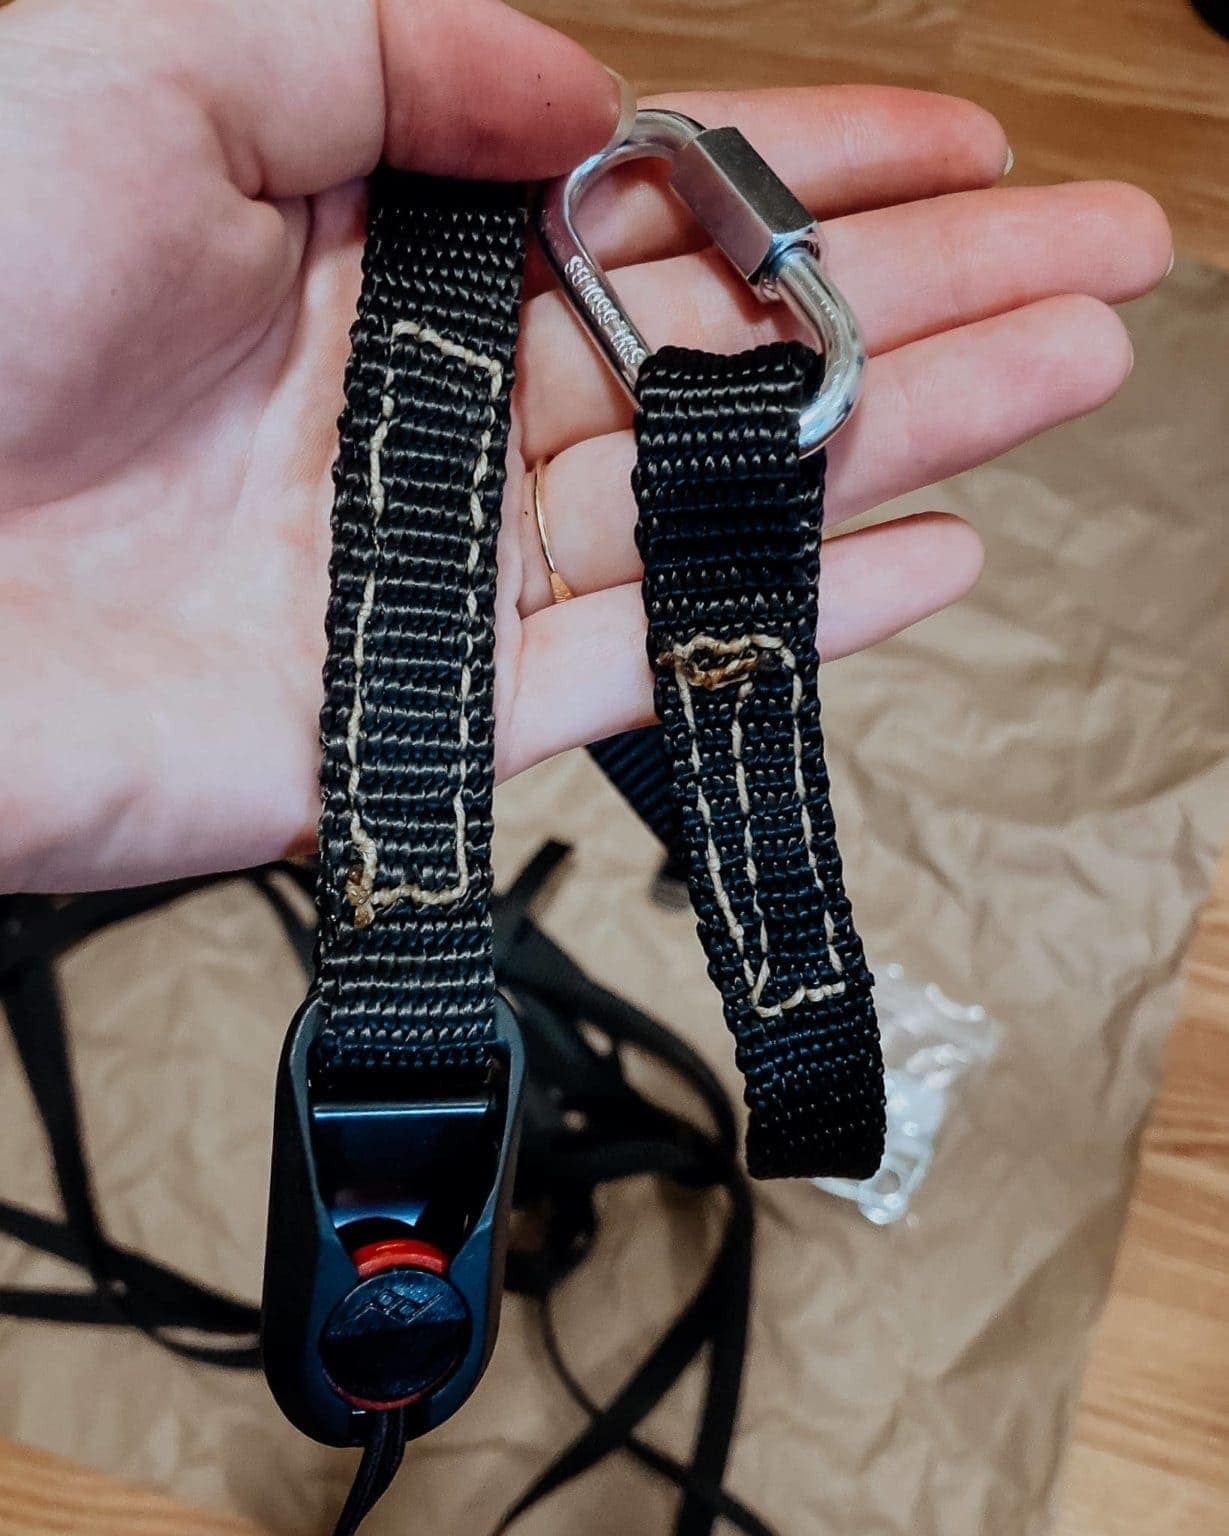
a note on the hip belt straps
The length of your “hip belt straps” really depends on the size of the lenses you anticipate using, and I’d encourage you to measure each of them individually based on your go-to lenses.
As you can see in the video above, one of my loops is a little bit loose for the smaller lens since I eyeballed the length for both straps based on my larger 50mm lens.
Since these “hip belt loops” are what are actually supporting the weight of your expensive cameras and lenses, it’s important that they fit well and are secure.
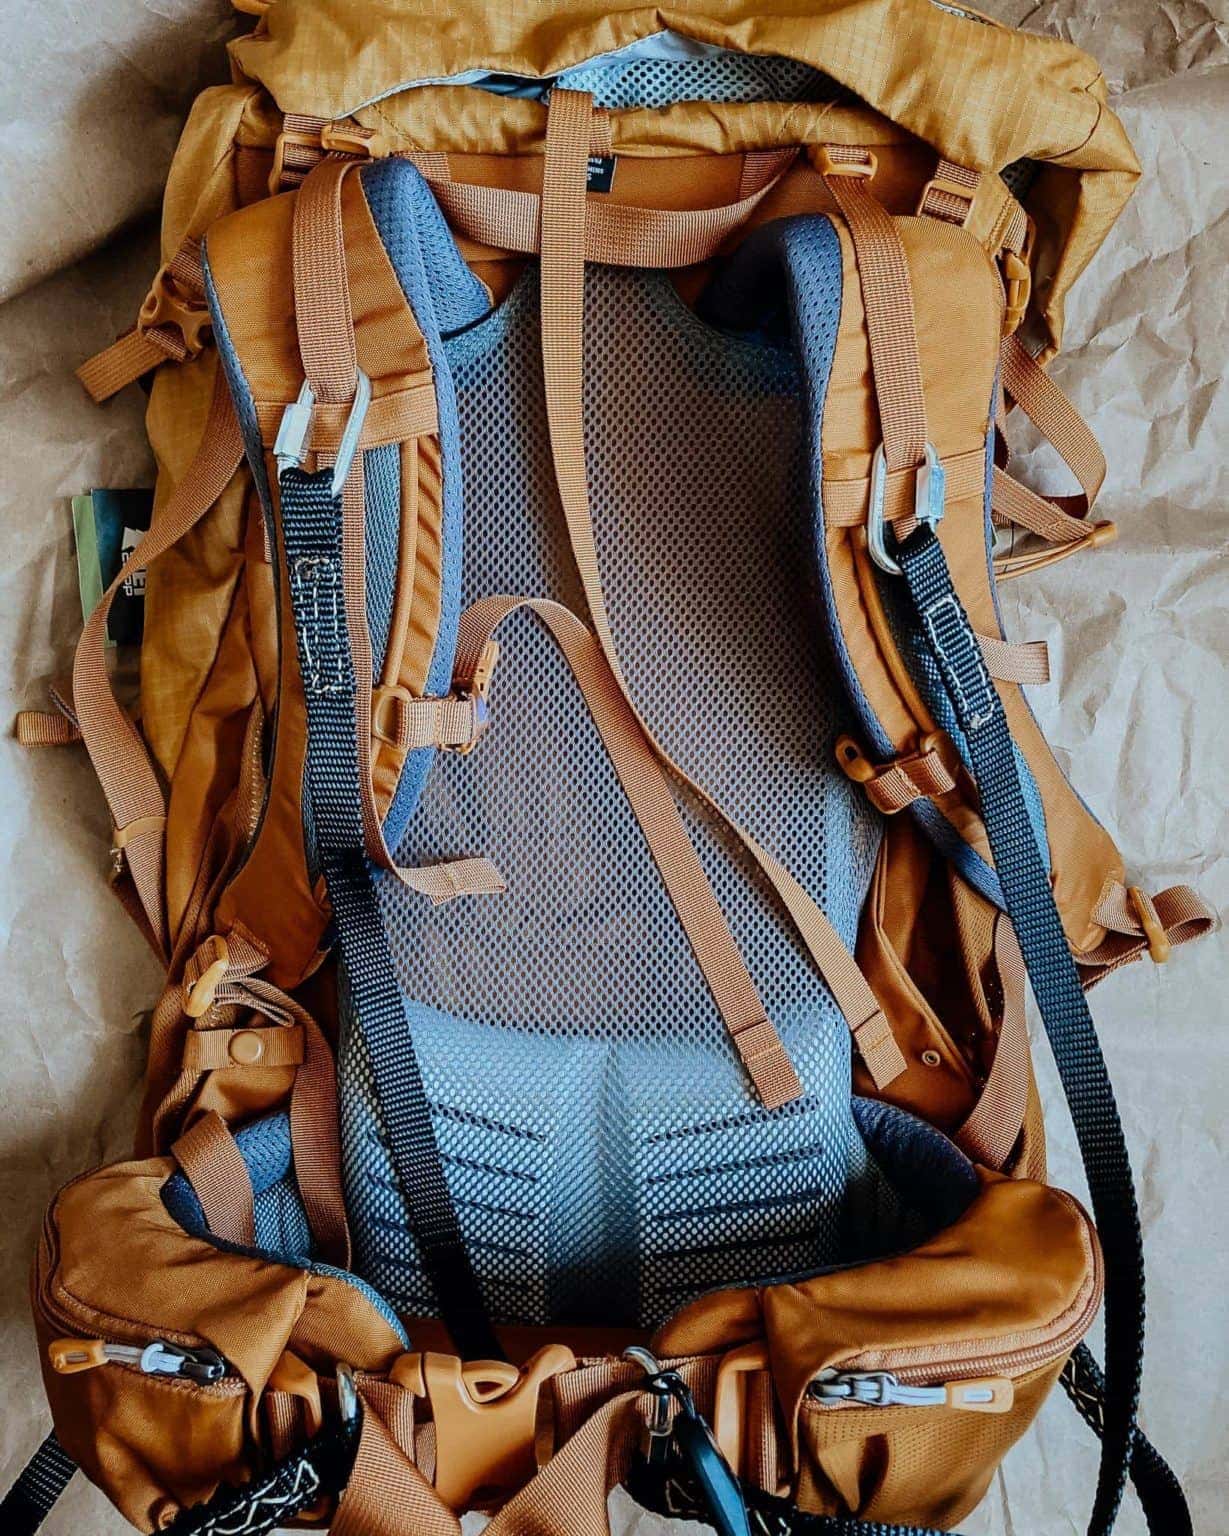
an optional extra detail
One little detail that I added, which you might notice in other images, is that I attached a spare Peak Design toggle to each of my “hip belt loops.” This is so that I can clip the “safety strap” to something to keep it from dangling and swinging freely if I am using the pack without my camera(s) because I was too lazy to just remove the dual camera harness.
If you use lobster claw clips for the end of your “safety straps,” you could easily just clip the “safety strap” to the “hip belt loop” that way.
There you have it!
This awesome dual camera harness system is about to become your best friend. Whether you’re shooting mountaintop elopements, photographing your favorite local wildlife, or traveling around the world!
Did you make any modifications to yours that make it extra sturdy and useful? Do you have questions about one of these steps? Let me know in the comments!
Here are some great instructional videos that you might find helpful!

I keep struggling to make my Rose Anvil harness work with a backpack, so this is awesome! Wish I would have saved money and skipped the harness. Thanks for sharing!